
Wall of meaning: How to hang photos at home
Personalise your space, by surrounding yourself with beautiful reminders of the people you love and life’s significant moments.
Surrounding yourself with photos of your favourite people and special memories adds meaning and context to your home. Sometimes these images are of a particular time in your life
— a childhood pet, your honeymoon — or maybe they’re candid family shots. Either way, arranging those pictures can be a bit tricky. Here are different styles to consider.
1. CENTRED ARRANGEMENT Position the largest artwork in the middle of the arrangement and hang smaller artworks around it. Centred arrangements look quite formal and work well in hallways, living and dining rooms.
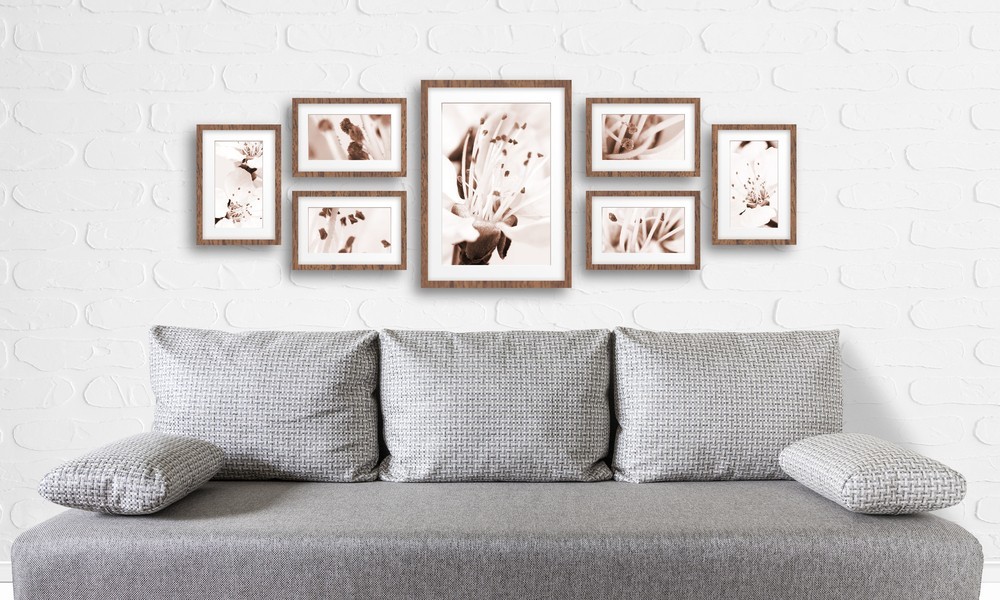
2. SYMMETRICAL ARRANGEMENT Position identically framed pictures equal distance apart on the wall in a symmetrical arrangement. This gives it a formal, tailored look that’s particularly suited above a sofa or console.
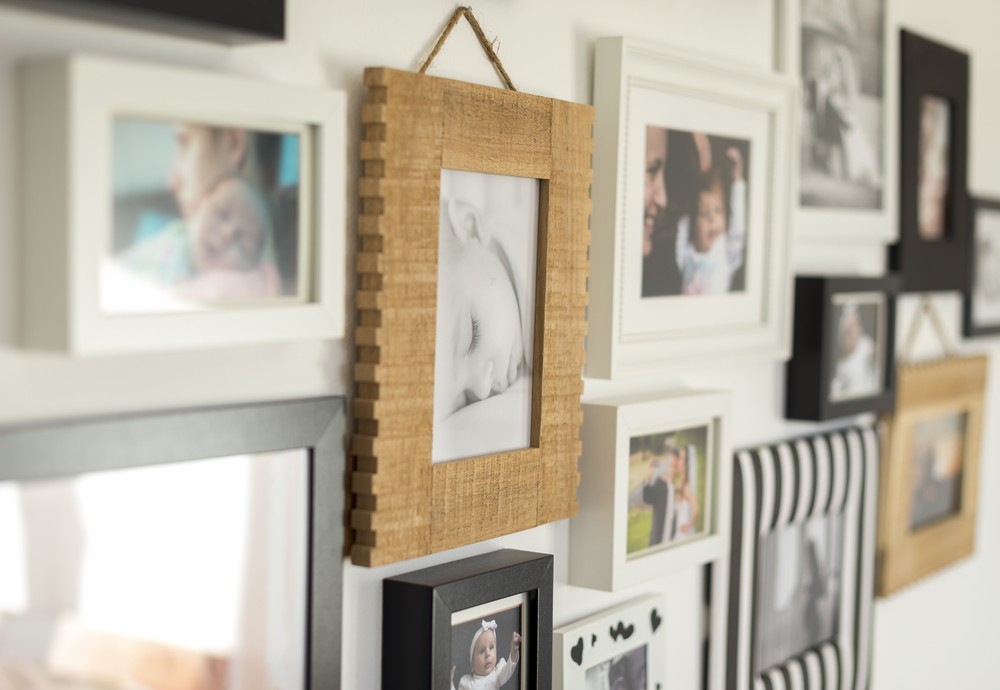
3. ASYMMETRICAL GROUPING This eclectic picture hanging style is effective in a variety of settings — hallways, bedrooms, living rooms — and is a great solution if you have lots of different pictures to hang. Aim for a common theme, such as frames of the same colour or a series of black-and-white prints.
4. VERTICAL ARRANGEMENT A long row of pictures can be used to jazz up awkward corners or enhance a low ceiling height. Aim to position the top frame above eye height and the bottom frame below thigh level.
5. HORIZONTAL ARRANGEMENT This method works best with pictures of the same size and frame type, and can be used to visually widen a room.
6. FLOATING SHELF Set framed photos or prints of various sizes on a floating shelf for a casual look. Overlapping the frames gives an even more relaxed feel, and allows you to add to the collection.
7. PICTURE WIRE Hanging a picture wire across the wall is a fun, casual way to display snapshots or kids’ art, which can be hung from the wire with pegs or clips. It’s easy to change things around and create an ever-rotating display.
NOW START ARRANGING Once you’ve settled on a style, arrange the frames on the floor and play around with configurations. Alternatively, use newspaper cut-outs to replicate the size of your frames, place your main piece in the middle of the wall with Blu Tack or removable tape, then arrange the other pieces around it. Move them around until you’re satisfied. Keep frames close together (no more than 10 centimetres apart), with the centre point of the middle frame at eye level. The following tools might come in handy…
SPIRIT LEVEL If your frame is heavy and you are using two wall mounts for one frame, use a spirit level to check that the marked spots on the wall are level. A level is also handy to see if the picture is straight once hung on the wall.
LASER LEVEL This tool emits a laser beam, which generates a visible, hands-free straight line on a surface. Easier than string, especially if you’re decorating solo. There are various types available at hardware stores, starting from about $30.
STUD FINDER This clever little gadget saves you banging your knuckles on the wall to ‘hear’ where the support studs or beams are positioned. It’s very easy and reliable.
PREPARE FRAMES FOR HANGING On the back of the frame, hanging wire should be positioned a third of the way down from the top of the frame. Position two D-rings or eye screws opposite each other, then thread your wire or string through. As a rule, the hanging wire shouldn’t be visible once the picture is hung, unless you use a picture rail.
MEASURE CORRECTLY Mark on the wall where the top of the picture frame lies when you have positioned it correctly on the wall. Hold the picture wire up with your finger and use a measuring tape to check the distance from your finger to the top of the frame. Measure that distance down from the pencil mark on the wall and mark the spot. This is where to position your hook.
H A N D L E WITH CARE Special mementos require sensitive handling. While it is now easy to make new copies of old photographs, the originals of ten have an authentic charm that can’t be replicated. Photos that are old or fragile should be mounted on acid-free cardboard and kept inside clear photo enclosures, available from specialty print shops. Avoid handling photos with your bare hands, as the acids in skin can damage prints — wear white cotton gloves and hold pictures by the edges. If a precious print is soiled, use a sof t, clean paintbrush to brush from the centre outwards.
A TIP FOR RENTERS If you rent, you’ll need adhesive removable hooks — available in various styles and sizes for lightweight pictures. They are easy to position, but be careful not to strip the paint of f the wall when removing the adhesive strip. These adhesive hooks are not as sturdy as a screw in a wall, so don’t use them to hang antiques or valuable items, nor for hanging objects over beds. And, of course, using them on a wallpapered surface is a big no-no.
Source: http://www.homelife.com.au/lifestyle/wall-of-meaning-how-to-hang-photos-at-home
This article provides general information which is current as at the time of production. The information contained in this communication does not constitute advice and should not be relied upon as such as it does not take into account your personal circumstances or needs. Professional advice should be sought prior to any action being taken in reliance on any of the information.

