
Reno Focus: Kitchen
As a room that sees a lot of activity, the kitchen can easily succumb to wear and tear. It is very often exposed to water, grease, and food and drink stains – all of which can soon make the room look tired and old.
The kitchen can seem to be an expensive room to renovate, as there are so many parts that need attention, not to mention the fact that it’s the most appliance-packed room in the house.

Refurb4Profit founder and CEO Paola Tapia, who has made a career out of transforming properties to maximise value, says an affordable cometic renovation is possible, provided your approach to the project focuses on effective, strategic planning. The crucial first step is to consider the purpose of the kitchen renovation.
Are you renovating for personal use, or to lease the home or sell it? This will help you determine the scope of the work, the materials you need to use, and the appropriate budget to cover what you want to achieve.
It’s also vital to look at the property as a whole with what Tapia calls “a connoisseur’s eye”. “It’s very important to study the property’s condition, location and demographic target audience to define where each dollar will be best spent, and to achieve a consistently appealing look throughout the property,” she says.
Having skilled tradespeople on hand can also help you achieve a new look for your kitchen in a short time frame, and sometimes at a comparable or even lower cost than a DIY reno.
“It’s very important to study the property’s condition, location and demographic target audience to define where each dollar will be best spent”
STEP ONE: FLOOR IT
The right flooring can add a lot to the aesthetic of a kitchen, so it’s important to decide on the look you want to achieve early on, and how you want it to blend into the rest of the home.
Tying the kitchen flooring in with the floor design of other rooms on the same level is a good way to create the illusion of space and cohesiveness. Tapia applied this philosophy to a recent renovation.
“We revamped the flooring with a mid-brown oak-laminated flooring to give a modern and warm effect throughout the property,” she says.
.JPG)
TOP TIP
It’s just not about the look but also the function. Kitchen flooring must be composed of water-resistant material, given its purpose, so laminate flooring is often the way to go if you’re on a budget.
.JPG)
STEP TWO: RESURFACE SOMETHING OLD
An old benchtop is a sad sight, but it does not always require a superexpensive full replacement. A good resurfacing could do the trick and make your benchtop look like new again – and the many options available can allow you play with different looks.
The right material matters, because you want your new benchtop to stand the test of time and withstand the rigours of cooking and washing.
“[We] gave the laminated dated benchtop a clean and crisp feel with a white stone look. Not only does it look new, but it’s also durable,” Tapia says.
TOP TIP
Typical benchtop options are laminate, timber and stone, with stone being the most expensive. A laminate benchtop finished with the look of another material can save you a great deal and is ideal for quick-flip projects.
STEP THREE: WORK WITH WHAT YOU’VE GOT
In a cosmetic renovation, it’s always wise to study the room in question before making any decisions, because you may not have to change much at all.
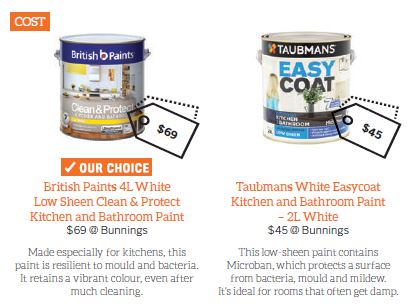
A fresh coat of paint can make your kitchen feel brand new by giving it a clean, fresh look, and it can also help you revamp the room by highlighting its design elements.
In Tapia’s case, she was able to maximise the look of the cabinetry’s original French provincial design in her kitchen reno. “We respected the style and just gave all cabinetry an uplift with a new colour and finish.”
TOP TIP
Since you’re working with a space that’s prone to water damage, it’s best to use paint that resists mildew and is hypoallergenic, while still providing rich colour. Remember, you’re keeping food in this room!
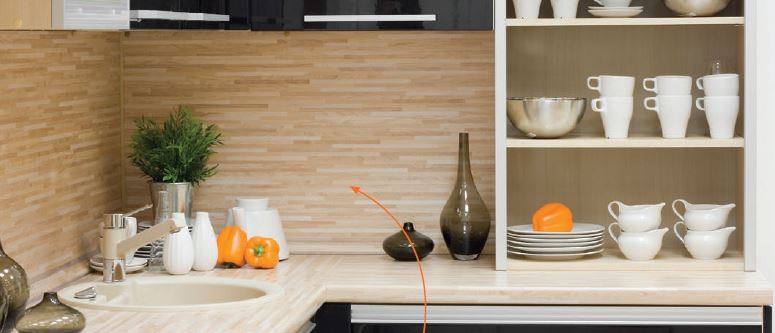
STEP FOUR: SPLASHBACKS TAKE THE STAGE
The splashback in a kitchen should not be downplayed but instead used to amp up the visual impact of the space. “The look of a kitchen can radically change based on what we do with the splashback,” Tapia says.
In addition to being crucial to protecting the wall from damage and mess, you can design an entire room around a splashback, as many splashbacks are a piece of artwork on their own.
You don’t always have to get a completely new one, however. “We used tile paint to refresh [the existing splashback] and give it a clean look,” Tapia says.

TOP TIP
Snag a splashback that makes a statement, and accentuate it with walls in a neutral shade to really make the artwork pop. Arty splashbacks can also hide stains – although you still need to clean regularly!

STEP FIVE: ACCESSORISE WELL
The little details matter in a kitchen renovation. Furniture accessories like taps and cabinet doorknobs can either enhance or detract from the aesthetic of the room, so they must be kept in mind when you’re looking to modernise.
In her renovation, Tapia demonstrates how simply replacing accessories can improve a kitchen. “To make sure we added appeal, the sink needed a new tap that went with the style and lifted the space.
We also installed brand-new chrome handles that matched the style overall,” she says. Investing in new accessories can also ensure that they work perfectly, as wear and tear over time can affect function.
TOP TIP
Opt for taps that can last a long time and are low maintenance, such as those made of stainless steel or chrome. They go easily with many styles and can update a space by adding a modern twist.

STEP SIX: CREATE FLOW THROUGHOUT
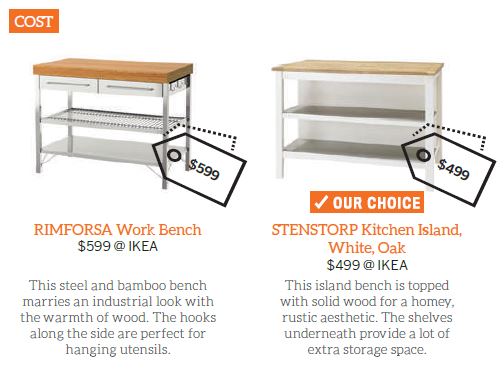
One of the easiest ways to enhance the look and flow of a kitchen is to install an island bench. It has become a staple of many modern kitchens as it can improve the layout of the room without requiring significant restructuring. Stores like IKEA sell flat-pack kitchen islands that you can put together yourself at low cost.
They are multifunctional, as many island benches have additional shelf space so you can store more items. They also serve as extra surfaces and are a great place to serve dishes and drinks to guests, making the kitchen perfect for entertaining.
TOP TIP
Position the kitchen island properly to make it the midway point between the cooking area and the entertainment hub. This creates a subtle divide without isolating whoever is prepping the food.
STEP SEVEN: LIGHT IT WELL
Great lighting does more than just COST enable you to see what you’re doing; it highlights what you’ve done to a space.
Lights in the kitchen should not just be harsh and bright but should also create ambience, especially as the kitchen is becoming a place where many people entertain guests.
It’s ideal to have dimmable lights so you can adjust settings according to purpose. Downlights are perfect for the ceiling because they don’t create shadows. Pendant lights are ideal for kitchens with islands – they come in various interesting styles and generate a warm glow.

TOP TIP
Recessed lights can be installed pretty much anywhere, so you can go for additional lighting where you’re cooking or near storage areas, ensuring that the room is adequately lit for the tasks you need to do.
Completely transforming the look of a kitchen on a set budget isn’t impossible. Paola Tapia explains how it’s done.

It’s not just about the big things; small COST decorative touches serve as the cherry on top in a beautiful kitchen. It can be as simple as an interesting painting on the wall or a funky corkboard with a list of recipes.
A shelf of colourful books can add vibrance, as will some fun utensils. Elegant vases filled with flowers (whether real or artificial) can breathe life into the room, and cute dishcloths or potholders hanging on the wall can improve the aesthetic while being functional.
“The finishing touches are paramount to increase appeal,” Tapia says.
.JPG)
TOP TIP
Don’t go overboard with the decorations; try to keep things minimalist for a clean, streamlined look. These elements should be there to support your existing aesthetic, not to overpower it.
Source: 5 November 2018 Your Investment Property https://www.therealestateconversation.com.au/blog/sam-danckert/looking-purchase-investment-property/danckert-real-estate/buying-investment


